API First Architecture: Real-Time Rental Data Without Database Bloat

Many rental websites still sync API data into local databases, assuming it’s the safest way to manage listings. But this approach quickly creates hidden costs: bloated tables, stale pricing, and heavy server loads that slow down the user experience.

With the global vacation rental sector expected to reach $105.7 billion in revenue by 2025, accuracy and speed aren’t optional — they’re business‑critical. Outdated listings or unavailable rooms frustrate users and erode trust, while competitors offering real‑time updates win conversions.

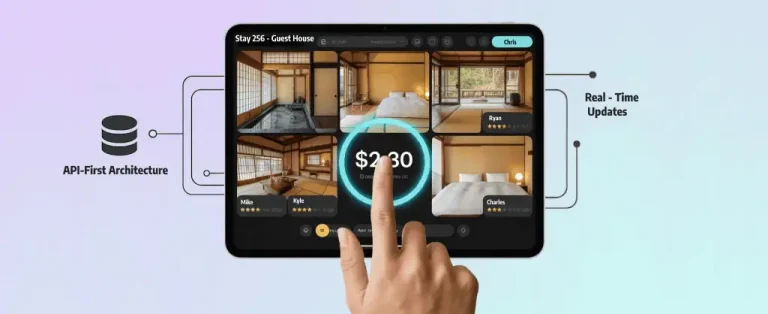
An API first architecture, implemented through API integration services, solves this by bypassing database syncs. Filters are passed directly to the API, delivering live responses that keep data fresh, servers lean, and performance consistently high.

To understand why this approach is so effective, let’s break down what API‑first architecture really means and how it changes the rental website workflow.

What Is API First Architecture?

API first architecture is an approach where APIs form the foundation for how data is accessed and displayed, rather than relying on a locally synced database. Instead of storing rental data inside the site, the system fetches live information directly from the API whenever users interact.

This approach is especially effective for rental and travel booking websites, where prices and availability change constantly, and accuracy is critical. By pairing API first architecture with a WordPress rental plugin or a vacation rental plugin WordPress setup, teams ensure listings stay fresh, trustworthy, and free from the burden of database syncs.

How API First Architecture Works?

How API First Architecture Works
  • APIs as the single source of truth: The rental management system’s API acts as the primary data source. Listings, pricing, and availability remain centralized, without duplication in the website’s database.
  • Frontend fetches live data on demand: When users apply filters—such as dates, location, or number of guests—the frontend sends those parameters directly to the API, which responds with real‑time results.
  • No database duplication: Unlike traditional setups that store rental data locally and rely on scheduled sync jobs, API first architecture keeps things lean by avoiding unnecessary database storage and reducing maintenance effort.
  • Always up‑to‑date pricing and availability: Because data is retrieved in real time, users see accurate prices and current availability—helping prevent booking conflicts and building trust.
  • Lean backend, faster performance: With fewer database operations and background sync processes, the backend stays lightweight, resulting in better performance and easier scalability.

Real‑World Example  

In a WordPress rental platform, this workflow means no more bloated databases or stale listings. By integrating an API first architecture with a WordPress rental plugin, property managers deliver accurate results every time a user searches — boosting trust and conversions.

WordPress rental live platform

For a detailed walkthrough of the full WordPress rental website migration and feature implementation, see our full case study.

Why Real‑Time Data Matters for Rental Websites?

In rental and travel platforms, accuracy isn’t just a technical detail — it’s the foundation of trust. A single outdated listing or incorrect price can frustrate users, damage credibility, and send potential customers straight to competitors.

Why it matters:

  • Accurate listings build confidence: Travelers expect availability and pricing to reflect reality. Real‑time data ensures users never encounter “ghost inventory” or misleading rates.
  • Better user experience drives conversions: Smooth, reliable booking flows reduce friction. When users trust the information they see, they’re far more likely to complete a reservation.
  • Competitive advantage in crowded markets: Platforms using API first architecture with a vacation rental plugin WordPress setup deliver instant updates, outperforming rivals stuck with slow sync cycles. 
  • Reduced support overhead: Fewer booking conflicts mean fewer customer complaints, saving time and resources for property managers.

For a deeper look at how modern travel platforms leverage real‑time accuracy, explore our guide on travel app development best practices.

What Are the Key Benefits of API First Architecture?

At its core, API first architecture removes the need for constant database syncs. Instead, the frontend communicates directly with the API, ensuring every interaction reflects live data. At The Brihaspati Infotech, we implement this approach to help rental platforms achieve faster performance, leaner infrastructure, and consistently accurate booking experiences. 

To understand why this approach is transformative, let’s break down the key benefits of adopting an API first architecture for rental platforms.

Key Benefits of API First Architecture

Lower server load

  • Eliminates background sync jobs and heavy database operations.
  • Keeps infrastructure lean and stable, even during peak traffic.

Real‑time data accuracy

  • Users always see fresh listings, pricing, and availability.
  • Prevents double bookings and builds trust with customers.
  • Outperforms traditional vacation rental plugin WordPress setups that rely on scheduled syncs.

Scalable performance

  • Lightweight backend makes it easier to handle traffic spikes.
  • Smooth growth without bottlenecks from duplicated data.

Simplified maintenance

  • No need to manage sync scripts or clean outdated records.
  • Developers focus on new features instead of troubleshooting.

Faster time‑to‑market

  • Features can be rolled out quickly with APIs as the single source of truth.
  • Reduces delays caused by backend rework.

Reduced infrastructure costs

  • Leaner hosting requirements lower server expenses.
  • Fewer customer support issues save operational costs.

Seamless integrations

  • APIs connect smoothly with external services, plugins, and workflows.
  • Easy to integrate with a WordPress rental plugin or custom booking engine.

API First setups also integrate seamlessly with external tools, such as our Chrome extension for travel agents, which streamlines flight searches and demonstrates the power of connected workflows.

Improved user experience

  • Responsive, trustworthy booking flows drive higher conversions.
  • While many teams search for the best rental property management WordPress plugin, API first builds deliver leaner, faster booking flows.

Ready to transform your rental platform with real‑time accuracy? Explore our custom API development services and discover how API first architecture can elevate your rental website.

What Are the Best Practices for API First Rental Websites?

Building a rental website on API first architecture requires more than just connecting endpoints. To maximize performance, scalability, and user trust, platforms should follow proven best practices that balance speed with reliability.

Best Practices for API First Rental Websites

Short‑lived caching for performance without stale data

  • Use caching to reduce server strain and speed up responses.
  • Keep cache lifetimes short to avoid outdated listings or pricing.

Page‑specific API calls

  • Trigger API requests only for the data needed on each page.
  • Prevent unnecessary calls to keep performance lean and responsive.

Secure API calls (HTTPS, authentication)

  • Always use HTTPS to protect sensitive booking and payment data.
  • Implement authentication tokens or keys to prevent unauthorized access.

Reusable components and shortcodes for WordPress

  • Build modular components or shortcodes that can be reused across pages.
  • Simplifies development and ensures consistency in how API data is displayed.

Reusable components and shortcodes for WordPress make it easy to scale content‑rich builds. For platforms expanding into content‑driven experiences, see our guide on building a travel vlogging website.

Monitor API rate limits

  • Track usage to avoid hitting provider limits during traffic spikes.
  • Implement fallback strategies to maintain UX.

Frequently Asked Questions

 What is API first architecture in rental websites?

API first means the API is the single source of truth, ensuring real‑time data delivery without relying on database syncs.
Looking to implement API‑first architecture for your rental platform? Connect with our custom API development company to build scalable, high‑performance solutions tailored to your business.

How much does it cost to implement API First architecture for a rental website?  

Customization: Advanced booking flows, property filters, or subscription bundles.
Complexity: Features like dynamic pricing, AI‑driven recommendations, or multi‑property dashboards.
Platform Integration: APIs for rentals (e.g., RentalReady), Mapbox for location visualization, and secure payment gateways.
Extra Features: Analytics dashboards, admin tools, or integrations with CRM/ERP systems.

Get a precise quote for your API‑First rental website project.

How long does it take to implement API First architecture for a rental website?

The implementation timeline depends on your project scope and complexity:
Customization
Complex Integrations 
Architecture Shift
Extra Features
On average, implementing API First architecture for a rental website takes 2 to 3 weeks.
Need a specific timeline for your project? Contact us

API First Architecture: Build Scalable Rental Solutions

Implementing an API First architecture transforms rental websites by eliminating sync delays, ensuring real‑time accuracy, and creating a scalable foundation for growth. 

From leaner servers to seamless integrations with WordPress rental plugins and advanced booking flows, the benefits extend across performance, trust, and user experience.

If you’re planning to build or scale a rental or booking platform, explore how custom directory and booking systems are designed for flexibility and growth.

Ready to future‑proof your rental platform? Partner with our API integration developers to design and implement API First solutions tailored to your business needs.

Why Property Management Portal Is Killing Your Brand: Build Your WordPress Rental Website

Property managers often rely on default booking portals because they’re quick to set up and promise convenience. But here’s the hidden cost: those portals strip away your brand identity, lock you into rigid templates, and make your business look indistinguishable from competitors. 

With 97% of apartment hunters starting their search online, blending into a standardized rental portal means losing visibility where it matters most. Instead of building trust and recognition, you’re stuck with a generic experience that erodes credibility and limits growth.

The good news? You don’t have to stay trapped. By migrating to WordPress Rental Website with the help of dedicated WordPress developers, you gain full control over design, integrations, and performance — transforming your rental site from a generic portal into a branded, conversion‑ready platform.

But before exploring how WordPress empowers property managers, it’s important to understand why relying on default portals is quietly undermining your brand.

How Property Management Portals Quietly Kill Your Brand?

Default property management portals may feel convenient at first. But that convenience comes with trade-offs—many of which quietly weaken your brand.

LimitationImpact on Your Brand
Generic designMost portals look identical. Same layouts and structure, making it impossible for a professional WordPress rental website to stand out.
Limited customizationYou’re boxed in. Adding features like a dynamic booking system or shaping the user journey around your audience is either restricted or not possible at all.
Vendor lock‑inYou’re stuck with whatever tools the portal provides, instead of choosing a rental plugin for WordPress with a dynamic booking system that fits your business model.
SEO blind spotsPortals rarely prioritize search visibility. While WordPress lets you build a travel booking website designed to rank, attract organic traffic, and grow long-term. 
User experience gapsClunky booking flows frustrate customers, reducing conversions and damaging trust.

Why a WordPress Rental Website is the Smarter Choice?

Migrating from restrictive property portals to a WordPress rental website gives property managers more control, flexibility, and room to grow. Instead of working within rigid platforms, WordPress lets you build a brand-driven, scalable rental website that adapts as your business evolves.

WordPress Rental Website benefits
  • Full brand control: WordPress offers complete design freedom through custom themes and plugins. You’re no longer stuck in a generic template. Your WordPress rental website looks and feel like your brand.
  • API integrations: Rental plugin for WordPress integrates smoothly with systems like RentalReady. This enables real-time listings, pricing, and availability—without compromising the booking experience. 
  • Beyond rentals, similar integration strategies power modern travel apps — as we explored in our Travel App Development guide — proving how APIs can transform user journeys across industries.
  • Scalability: Growth shouldn’t require a platform switch. As your portfolio expands, WordPress grows with you. Add subscriptions, bundles, analytics, or extend functionality using a rental plugin built for your specific needs.
  • SEO & content marketing: Unlike property portals, WordPress is built for visibility. Publish blogs, landing pages, and schema‑optimized content with ease. This makes it simpler to build a travel booking website on WordPress that ranks well and attracts organic traffic. 
  • For example, in our WordPress travel vlogging website project, SEO‑optimized blogs and landing pages helped drive organic reach — the same strategy applies to rental websites looking to stand out.
  • Cost efficiency: By avoiding vendor lock‑in, you reduce recurring fees and gain flexibility to choose the tools and hosting that fit your budget along with a dynamic booking system.

How We Transformed a Travel Portal into a WordPress Rental Website: Our Case Study

At The Brihaspati Infotech, we helped a property management client move from a restrictive rental portal to a fully customized WordPress rental website. Their old system relied on generic templates, inefficient booking flows, and offered no SEO visibility — making it impossible to stand out in a competitive rental market.

By integrating RentalReady APIs with WordPress, we built a dynamic booking system that synced real‑time listings and pricing. To enhance the user experience further, we implemented Mapbox integration, allowing renters to view properties on interactive maps, filter by location, and explore nearby amenities — a feature the portal simply couldn’t support.

A tailored rental plugin for WordPress added subscriptions, bundles, and analytics, while SEO‑optimized landing pages enabled the client to create a travel booking website with WordPress that ranks, converts, and scales with ease.

Here’s a detailed breakdown of how we approached the build and delivered this scalable property booking solution:

How to Migrate Rental Website to WordPress

1: Defined Core Objectives

  • Move away from the default RentalReady portal.
  • Gain full brand control, SEO visibility, and customization.
  • Deliver a scalable WordPress rental website with a dynamic booking system.

2: Integrated RentalReady API

WordPress Website connected with RentalReady API
  • Connected WordPress with the RentalReady API.
  • Enabled real‑time apartment listings, availability, and live pricing.
  • Eliminated manual updates for accurate, up‑to‑date data.

We’ve applied similar automation principles in other projects, such as building a Chrome extension for travel agents to streamline flight searches — proving how smart integrations reduce manual effort and improve efficiency across industries.

3: Developed Custom WordPress Plugin & Short codes

  • Built a tailored rental plugin for WordPress with a dynamic booking system.
  • Created reusable shortcodes to fetch and display dynamic data.
  • Allowed listings to be placed flexibly across pages and landing sections.

4: Implemented Mapbox Integration

Mapbox Integration implementation
  • Integrated Mapbox for interactive property maps.
  • Enabled renters to view apartment locations visually.
  • Added filters for area, amenities, and nearby attractions.

5: Designed Search, Filter & Booking Flow

  • Built intuitive search and filter options.
  • Streamlined booking flow to replace inefficient portal processes.
  • Supported multiple payment gateways for user convenience.

For a deeper look at real-time data flows and scalable backend design for rental platforms, check out our API‑First Architecture: Real‑Time Rental Data guide. It explains how API-first design powers dynamic listings, availability checks, and performance-driven features.

6: Delivered Full Brand Control & Customization

SEO optimized blogs on WordPress Rental Website
  • Allowed the client to create a travel booking website with WordPress.
  • Enabled SEO‑optimized blogs, landing pages, and schema markup.
  • Removed vendor lock‑in, reducing recurring costs.

7: Optimized Performance & Security

  • Implemented caching with WP Rocket.
  • Used selective library loading for faster performance.
  • Secured transactions with HTTPS protocols.

This isn’t our first rental revolution — see how we’ve driven the online transformation of an Australian real estate builder, delivering scalable WordPress Rental website with custom plugins, API integrations, and performance‑driven design

Ready to transform your rental website? Hire WordPress developers to integrate RentalReady APIs, build custom plugins, and add advanced features like Mapbox maps, subscriptions, and analytics.

How to Optimize Your WordPress Rental Website for Growth?

Optimizing a rental website with WordPress requires a clear roadmap that balances technical upgrades with business goals. Here are the key actions to take:

Travel Website optimization tips

Audit your current portal

  • Review design consistency, SEO visibility, and booking flow efficiency.
  • Identify friction points that reduce conversions or limit brand identity.

Identify essential integrations

  • Map out required rental APIs (e.g., RentalReady).
  • Include interactive maps (Mapbox), payment gateways, and analytics tools.

Plan migration strategy

  • Define a roadmap for moving to WordPress.
  • Leverage custom plugin development and shortcodes for dynamic data display.

Prioritize performance optimization

  • Implement caching solutions like WP Rocket.
  • Use image compression and selective library loading for faster load times.

Ensure clear communication

  • Maintain tight collaboration between technical and non‑technical stakeholders.
  • Align goals, timelines, and expectations to avoid missteps during migration.


WordPress Rental Website: Frequently Asked Questions

Why should I migrate from a rental portal to WordPress?

WordPress offers full design control, SEO visibility, and scalability, unlike restrictive portals that limit customization and growth. Create a travel booking website with WordPress to add custom APIs, plugins, and advanced features like real-time bookings.

Looking to migrate to WordPress? Hire dedicated WordPress developers

What role does Mapbox integration play in rental websites? 

Mapbox adds interactive maps, allowing users to view property locations, filter by area, and explore nearby amenities. 

Beyond rentals, we’ve also leveraged Mapbox in other projects — for example, in our Custom Map Printing WordPress Plugin, where it powered personalized 3D map tools. The same tech makes sites more engaging—perfect when you create a travel booking website with WordPress to visualize locations, neighborhoods, and amenities for better user exploration.

Looking to add Mapbox integration to your rental website? Contact us today to discuss your project.

How much does it cost to build a WordPress rental website? 

The cost of building a custom WordPress rental website depends on several factors:
Customization: Features like advanced booking flows, property filters.
Complexity: Logic such as dynamic pricing, AI‑driven recommendations, or multi‑property dashboards.
Platform Integration: APIs for rentals (e.g., RentalReady), Mapbox for location visualization, and secure payment gateways.
Extra Features: Options like analytics dashboards, admin tools, or integrations with CRM/ERP systems.
Create a travel booking website with WordPress affordably—Contact us for a precise quote on your project

How long does it take to build or migrate a rental website to WordPress?

The timeline to migrate a rental website to WordPress depends on the scope and complexity of your project, such as custom features to be added and complex Integration.
On average, migrating a rental website takes around 2 to 3 weeks.
Need a specific timeline for your project? Contact us

WordPress Rental Website: Built for Growth

Migrating your rental website to WordPress unlocks far more than design freedom — it creates a scalable, SEO‑friendly platform tailored to your growth. With integrations like RentalReady for real‑time listings and Mapbox for interactive maps, WordPress transforms a static portal into a dynamic booking system. 

By prioritizing performance, customization, and clear communication, property managers can future‑proof their websites and deliver seamless experiences to renters.

If you’re exploring advanced booking solutions, check out our Custom Directory Listing & Booking Platform blog to see how WordPress can scale for multi‑vendor rentals and reservations.

Looking to optimize your rental website with WordPress? Hire WordPress website designers today and build a rental plugin for WordPress that’s secure, scalable, and designed exclusively for your business.

How Product Configurator Software Is Changing the Game for the Electronic Industry?

Buying and setting up electronic devices can feel overwhelming when there are so many options to choose from. Customers want the freedom to mix and match components, see how everything fits together, and feel confident that their setup will work — without needing a technician at every step. A recent Deloitte study found that 80% of consumers prefer personalized experiences and are willing to spend up to 50% more with brands that offer them. That’s exactly what product configurator software delivers. It’s an easy‑to‑use tool that guides users through product choices, checks compatibility in real time, and helps them design the perfect setup with confidence. 

For example, one of our clients — a broadcast technology provider specializing in professional video and signal processing equipment — needed a way to simplify complex device workflows for their customers. Our WordPress developers built a modern, responsive product configurator software that allows users to select frames, add electronic cards, and generate quotes instantly.

This ecommerce personalization tool accelerates their entire sales cycle. It enables customers to configure multiple electronic items in one session, helping to speed up the quote process. In this blog, we will walk you through the key features of our product configurator software, how it works, and what benefits it contributes to electronic industry.

Let’s get started!

What is a Product Configurator Software & How It Simplifies Electronics Customization?

Product configurator software is an interactive tool that lets customers design and personalize electronic devices online. Instead of relying on manuals or technical support, users can select components step‑by‑step, while the software automatically checks compatibility and ensures only valid combinations move forward.

 Product Configurator Software

For the electronics industry, this means customers can confidently mix and match device models, add accessories, and instantly generate quotes. Businesses benefit from fewer errors, faster sales cycles, and higher customer satisfaction — turning complex product setups into a simple, guided experience.

Our Product Configurator Software in Action

The configurator is seamlessly integrated into the client’s WordPress site. It guides users through frame selection, component customization, and quote generation in a simple, step-by-step flow. Customers can interact with it in real time. They can validate options, swap components, and build complete electronic setups with ease in no time.

Want to see it in action? Check out the walkthrough video below.

Key Features of Our Product Configurator Software

At The Brihaspati Infotech, we recently built a custom product configurator software for WordPress — designed to simplify complex electronic workflows for broadcast professionals. Instead of navigating manuals or relying on technical support, customers can now explore options in a guided, real‑time interface. They can choose device models, add components, and attach supporting accessories with ease.

It’s more than just a configurator tool — it’s a fully personalized configuration journey. Smart validation ensures that only compatible choices move forward, so customers never waste time on mismatched parts. The result? A visual product configurator that balances precision with usability, helping customers design systems confidently.

This software serves as both a customer‑facing tool and a sales enablement powerhouse. Users can explore, customize, and request quotes instantly, while sales teams receive structured, high‑quality data that speeds up the entire deal cycle.

Below is a detailed look at the key features that make this product configurator software for the electronic industry so effective:

Key Features of Product configurator software

Easy Device Selection

Configurator for broadcasting devices
  • The configurator offers a guided interface where users can pick from multiple frame models like HPF-9500, HPF-MAX, and oGx. 
  • Each frame can be customized with power supplies, network cards, support kits, and more. 

Multiple Device Setup

Configurator with multiple device setup
  • The configurator supports up to three frames in a single session, so user can configure more than one device in single session.
  • Each frame is configured independently, so users can design multiple systems without starting over. 
  • This turns the tool into a true visual product configurator — one that scales with real broadcast workflows. 

Smart Compatibility Checks

  • Behind the scenes, the configurator uses intelligent validation rules. 
  • These rules mirror real-world constraints and prevent incompatible components from being paired together.
  • Every layout reflects how the product configuration aligns with what is actually built and shipped.

Instant Quote Generator

Instant Quote Generator
  • Once the configuration is complete, the tool generates a clean PDF. 
  • It summarizes every selected component in a clear, structured format — perfect for procurement teams and sales reps. 
  • Integrated directly into the product configurator for WordPress, this feature accelerates follow-ups and keeps the process moving.

Guided, Visual Interface

UI of Broadcasting device configurator
  • The UI guides users through the configuration process with clarity and step-by-step instructions. 
  • The flow keeps users confident and engaged. 

Responsive & Bug-Free Performance

  • The front-end is optimized with smooth JavaScript interactions and tested across multiple devices and browsers. 
  • Whether on desktop or mobile, the visual product configurator delivers a modern, professional experience every time.

Sales Enablement Integration

  • This tool isn’t just customer-friendly — it’s a sales asset. 
  • Customers define their needs upfront, reducing endless back-and-forth.
  • Sales teams get cleaner, structured data from quote requests. 
  • It enables better leads and faster cycles.

Product Configurator Software: Business Benefits

A product configurator software delivers real, measurable advantages for customers and sales teams. Smart validation meets a clean interface. This product configurator tool transforms complex electronics configuration into a scalable, customer‑friendly process.

Benefits of product configurator software
  • Faster Sales Cycles: Customers configure systems, validate options, and request quotes instantly. Deals close faster with a shortened sales cycle.
  • Reduced Configuration Errors: Built-in logic keeps everything in check. Only valid combinations move forward and provide smooth operations.
  • Improved Customer Experience: The visual product configurator empowers users to explore and customize independently. Self‑service functionality reduces reliance on technical support, while the guided interface makes even complex setups approachable.
  • Higher Lead Quality: Sales teams get better-qualified leads with a 3D product visualizer. Quote requests come complete, structured, and ready to act on.
  • Scalable Pre-Sales Process: It works 24/7. Scales effortlessly as demand grows while maintaining efficiency. The product configurator for WordPress becomes a long-term sales asset.

Applications of Product Configurator Software Across Industries

A well‑designed product configurator software can transform how customers interact with complex products, offering personalization, validation, and real‑time visualization. Although this project highlights a broadcast device configurator for WordPress, our expertise extends to ecommerce personalization solutions across multiple industries. Explore our other projects built around product configuration tools.

Applications of product configurator software

1. E‑commerce and Retail

3D Clothing Configurator: Shoppers design apparel by picking fabrics, colors, and styles with a visual product configurator. Instant previews show exactly how it looks. It offers a personalized shopping experience with fewer returns and happy customers.

2. Technology

PC Configurator: Tech enthusiasts can build custom computers by selecting processors, memory, storage, and graphics cards.  Intelligent configuration rules ensure compatibility, while the configurator generates a ready‑to‑order system.

3. Manufacturing Products

Automobile Configurator & 3D Car Configurators: Automotive brands use product configurators for WordPress or custom platforms to select trims, accessories, and performance packages. Trailer manufacturers let buyers design load-specific solutions. 

4. Home & Interior Design

Custom Wall Art Tool: Interior design platforms offer configurators where users can upload images, choose frames, and preview wall art in different room settings. This visual product configurator bridges creativity with purchase confidence.

Frequently Asked Questions

How does the product configurator software ensure compatibility between components?

The product configurator software ensures compatibility by applying built‑in validation rules that block invalid component pairings, showing only options that work together in real‑world builds. This intelligent logic reduces errors and builds customer confidence.

What businesses benefit from a Product Configurator software?

A product configurator software helps businesses simplify complex customization, ensuring compatibility and boosting customer confidence. With real‑time personalization and seamless integration, it transforms the buying journey into an engaging experience.
Looking to deliver the same level of personalization in your online store? Explore our eCommerce Personalization Tools Development services and transform how customers interact with your products.

How much does it cost to build a Product Configurator software?

The cost of building a custom product configurator for WordPress depends on several factors:
Customization: Advanced filtering of components, pricing options, or real‑time visualization.
Complexity: Compatibility validation, multi‑frame support, or AI‑driven suggestions.
Platform Integration: Connecting with platforms such as Shopify or WooCommerce.
Extra Features: Options like PDF quote generation, multi‑frame configuration, or backend admin tools add to the scope.
Need a precise quote for your configurator project? Contact us to discuss your requirements.

How long does it take to build a product Configurator software?

The development timeline for a custom product configurator for WordPress depends on several factors:
Level of Customization
Complexity of Features
Platform Integration
Testing & Bug Fixes
On average, building a tailored visual product configurator tool takes about 1 to 2 weeks.
Need a specific timeline for your project? Contact us

What is a Product Configurator Software?

Product configurator software is an interactive tool that lets customers design and personalize electronic devices online.

Product Configurator Tool: Catalyst for Sales & Efficiency

A custom product configurator for WordPress is more than just a technical solution — it’s a powerful way to streamline product selection, reduce errors, and deliver a personalized customer experience. By combining guided customization, compatibility validation, and professional quote generation, businesses can transform how customers engage with complex products and how sales teams qualify leads.

At the same time, configurators are part of a broader ecosystem of personalization tools. Our eCommerce Personalization Tools Development services help brands across industries create intuitive, customer‑centric experiences that drive engagement and conversions.

Looking to explore more? One such example is our online product configurator, which shows how real‑time compatibility checks and dynamic filtering can elevate customer confidence in the technology sector.

Ready to discuss your own configurator project? Contact us today and discover how we can tailor solutions to your business needs.

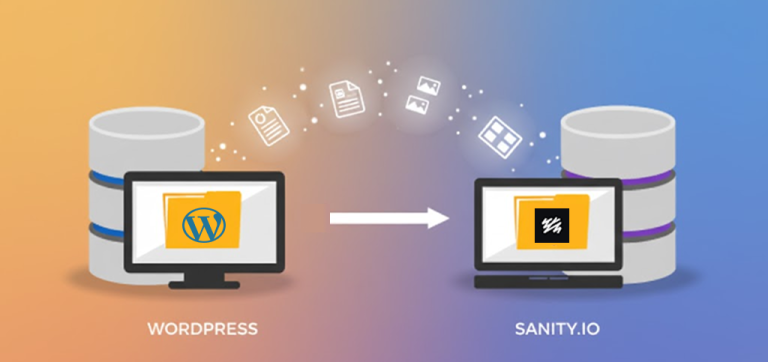
Migrate Content from WordPress to Sanity Headless CMS: Optimize Site Speed

Website speed is crucial for user retention, engagement, and SEO. Research shows 53% of visitors abandon a site if it takes more than three seconds to load. Performance is the primary component for user retention and SEO growth. For our client’s content-driven wellness blog website, slow WordPress load times were impacting growth and engagement.

Our dedicated WordPress developers migrated the site to a modern stack: Sanity Headless CMS, Next.js, and Vercel.  Result? Faster load times, a scalable architecture, and a system built for the future.

In this blog, we’ll break down how Sanity’s headless architecture provides faster content delivery and why migrating content from WordPress to Sanity can be the best choice for content-driven websites. Hire expert React Js developers to ensure a smooth, high-performance website post-migration. Let’s get started!

Why Migrate content from WordPress to Sanity Headless CMS?

For many content-rich websites, WordPress struggles to keep up with the growing demands of performance and scalability. Here’s how WordPress can hinder your website’s potential:

  • Plugin Overload: WordPress relies on many plugins, which slow things down. Each plugin adds complexity and can create compatibility issues. The result? Slower load times.
  • Monolithic Themes: WordPress themes are often rigid. Customizing them to fit your brand takes time and effort. It’s frustrating and inefficient.
  • Database Bloat: WordPress sites with lots of content suffer from slow database queries. As the site grows, performance issues get worse, making scaling difficult.

Migrating to Sanity Headless CMS clears these bottlenecks. It’s a streamlined, efficient system built for growth and speed.

Why Sanity & Next.js Are the Future of Fast Blogs?

Website performance has become crucial than ever. A modern tech stack is essential. Here’s why Sanity Headless CMS and frontend Next.js are the perfect duo for fast, scalable blogs:

FeatureDescription
Headless CMS (Sanity)Sanity separates content management from the frontend. This gives flexibility and efficiency. Content is delivered via APIs, ensuring real-time updates and faster delivery. Result? Faster load times and a better user experience.
Next.js Static Site Generation (SSG)With Next.js, pages are generated at build time, offering instant load times for users. It boosts SEO, speeds up the site, and makes browsing smoother.
Minimal DependenciesWordPress uses tons of plugins and heavy themes. Next.js and Sanity keep it lean. It minimizes overhead and eliminates bloating for better performance.
Optimized PerformanceNext.js offers Incremental Static Regeneration (ISR). On-demand page updates without rebuilding the whole site. And with Vercel’s global edge network, you get faster page rendering, less latency, and faster load times—especially for users worldwide.

Together, Sanity and Next.js deliver the foundation for high-performance, scalable blogs. Speed, engagement, Performance; everything together.

Looking to enhance your website with Sanity Headless CMS? Hire React.js developers today to accelerate your website’s performance and scalability.

Steps to Migrate Content from WordPress to Sanity: Our Case Study

At The Brihaspati Infotech, our expert team has successfully migrated a content-rich wellness blog website from WordPress to Sanity headless CMS. The old WordPress platform couldn’t keep up with the demands of performance and scalability. Slow load times were hurting user engagement and SEO. 

This wasn’t just a performance upgrade. It was a strategic shift. By using Sanity’s headless architecture, we separated content management from the frontend. Content is now delivered via APIs in real time. Frontend Next.js ensured faster page loads and boosted SEO with static site generation (SSG). For hosting, we used Vercel. Its global edge network and auto-scaling features significantly improved performance.

The result? A faster, more responsive website that scales with ease. Here’s a detailed breakdown of how we approached the migration and built this scalable solution:

Steps to Migrate Content from WordPress to Sanity Headless CMS

1. Prepared WordPress Content for Migration

  • Exported Content from WordPress: We used WordPress’s built-in export tool. Got all the key content—posts, pages, categories, tags, and media. They were saved as an XML file.
  • Reviewed and Cleaned Content: Deleted old drafts, unused plugins, or unnecessary media. We made sure only relevant content was migrated.
  • Handled Media Files: Organized images, videos, PDFs, etc., for re-upload. Bigger media files were manually re-uploaded to ensure good quality in the new CMS.

2. Set Up Sanity CMS

Sanity Dashboard
  • Created a New Sanity Project: Ran Sanity’s CLI tool. This set up the backend.
  • Configured Schemas for Content Types: Created custom schemas for posts, categories, authors, media, etc. Sanity’s flexible system makes it easy to structure content your way.
  • Defined Custom Fields: Set up the right field types for text, images, references, and rich text. This would align WordPress data with Sanity’s structure.

3: Imported WordPress Data to Sanity

Imported WordPress Data to Sanity Headless CMS
  • Used Import Tools: Used Sanity’s import tool or built a custom script to convert the WordPress XML into a Sanity-friendly JSON format.
  • Mapped WordPress Data to Sanity Schema: Made sure WordPress content mapped correctly to the Sanity fields. We also transformed some data to fit the new model.
  • Resolved Shortcodes and Custom Content: We converted WordPress shortcodes and custom HTML to match Sanity’s content structure. Ensured a smooth transition.

4. Build the Frontend with Next.js

Website Frontend with Next.js
  • Integrated Next.js for Static Site Generation: Next.js fetches content dynamically from Sanity. Static pages are generated at build time, which speeds up load times and improves SEO.
  • Implemented Incremental Static Regeneration (ISR): With ISR, frontend Next.js can update pages incrementally without rebuilding the entire site. Content remains fresh with fast load times.
  • SEO Optimization: Used Next.js’s SEO features. Optimized titles, meta descriptions, URL slugs, and routing for better search engine visibility.

5. Deployed & Optimized with Vercel

Next.js site deployment with Vercel hosting
  • Deployed with Vercel: Deployed Next.js site with Vercel hosting. It’s easy, serverless, and scales automatically.
  • Leveraged Automatic Scaling: Vercel handles scaling based on traffic. No need to worry about manual interventions or downtime.
  • Utilized Global Edge Network: Vercel’s edge network speeds up static assets delivery. Faster performance, even for users far from the server.

Need assistance with migrating your WordPress site to Sanity Headless CMS? Hire WordPress developers to ensure a smooth, seamless migration process.

WordPress to Sanity Migration: Challenges & their Solutions

Migrating content from WordPress to Sanity Headless CMS comes with challenges. While the benefits of a modern, scalable CMS are clear, there are key issues to address. Here are the main challenges we faced and how we solved them:

WordPress to Sanity Migration Challenges

1. Ensuring Compatibility When Transferring Content

  • WordPress content often uses shortcodes and embedded media, which don’t fit into Sanity’s structure. 
  • To solve this, we built a custom pre-import transformation tool. It cleaned up the content, converting shortcodes and WordPress-specific elements into Sanity-friendly formats. This ensured smooth migration with minimal disruption to the content’s structure.

2. SEO Preservation During WordPress to Sanity Migration

  • Maintaining SEO was critical. We needed to preserve URL structures, metadata, and other SEO elements. 
  • We used Sanity’s flexible schemas and custom redirect rules to map old URLs to the new structure. Structured data (schema.org) markup was implemented to keep rich snippets and optimize search visibility.

3. Data Integrity and Performance Bottlenecks

  • Ensuring data integrity was key. We had to move large amounts of data from WordPress to Sanity without risking performance. 
  • To minimize issues, we ran incremental migrations and tested performance at each step. Using Sanity’s real-time updates and Next.js’s Incremental Static Regeneration (ISR), we kept server load low and sped up content delivery. We also streamlined media imports to avoid post-migration performance problems.

Ready to elevate your content website’s performance and scalability? Our expert Website Migration Services ensure a seamless transition to a faster, more efficient platform. 

Key Benefits of Adopting Sanity Headless CMS

Migrating to a headless CMS like Sanity brings powerful advantages. By decoupling content management from the frontend, Sanity ensures faster, more scalable websites that are easier to maintain. Here’s why Sanity is a top choice for modern content management:

Key Benefits of Adopting Sanity Headless CMS
  • Faster Load Times: Sanity’s real-time content updates and efficient CDN ensure fast content delivery globally. This cuts down load times, improving both user experience and SEO.
  • Optimized Performance: When integrated with Next.js, Sanity optimizes caching and static site generation (SSG). Next.js’s Incremental Static Regeneration (ISR) ensures dynamic pages load quickly. Static and dynamic content? Perfectly balanced.
  • Scalability: Sanity’s headless architecture grows with you. As content or traffic increases, Sanity handles it easily without sacrificing performance.
  • Simplified Content Management: Sanity’s intuitive interface lets even non-technical users manage content in real-time. Updates are quick and easy, keeping your site fresh with minimal effort.
  • Minimal Overhead: No heavy plugins or themes. Sanity keeps things lightweight and secure. No more complex, plugin-heavy systems like WordPress—lower costs and less maintenance.

With Sanity, you get a powerful, scalable, and efficient content management system, built for the future.

Ready to optimize your website with Sanity Headless CMS? Hire our expert React.js developers to help integrate Sanity seamlessly into your frontend for maximum performance. 

Frequently Asked Questions

Why should I migrate content from WordPress to Sanity Headless CMS?

Migrating to Sanity Headless CMS boosts your website’s speed, scalability, and flexibility. It removes the need for bulky plugins and themes, speeds up load times, and streamlines content management.
Ready to level up your website? Contact us today for expert Website Migration Services!

Will migrating to Sanity headless CMS affect my SEO?

No, migrating to Sanity won’t hurt your SEO. In fact, faster load times and better performance can actually improve your SEO ranking. We ensure SEO redirects and schema implementations are in place to keep your rankings intact.
Worried about SEO during migration? With our Custom Web Development Services, we make sure your site’s SEO stays strong throughout the process. Let’s talk.

Can I continue using my existing design with Sanity after migrating from WordPress?

Yes! Since Sanity is a headless CMS, you have full control over frontend design.
Looking to maintain your design while migrating to Sanity? Hire WordPress developers to help you with seamless migration. 

How much does a WordPress to Sanity migration Cost?

The cost of the WordPress to Sanity migration depends on several factors:
Website Size & Complexity: Websites with lots of pages and custom features.
Data Transformation: WordPress content needs to be formatted. 
Frontend Development: Redesigning or adapting your site’s frontend.
SEO & Redirects: Maintaining SEO and ensuring proper URL redirects.
Custom Integrations: If you need custom API integrations or extra features

Need a precise quote? Contact us!


How Long Does the WordPress to Sanity migration take?

The timeline for the WordPress to Sanity migration depends on the following factors:
Website Size & Content Complexity
Frontend Development
SEO & Redirects
Testing & Optimization
On average, a WordPress to Sanity migration can take between 3 to 4 weeks.
Need a more specific timeline? Contact us!

Sanity Headless CMS Migration: Boost Performance

Migrating to Sanity Headless CMS is more than just a performance boost. It’s a strategic upgrade to a modern, scalable, and efficient content management system. With Sanity, your website will load faster, update content in real time, and enjoy the flexibility of a headless architecture. This makes it easy to scale and integrate with the latest technologies.

Our expert team specializes in website migration services, ensuring a smooth migration from WordPress to Sanity Headless CMS. We handle everything—from data transformation and content import to frontend development with Next.js and Vercel for better performance. We also preserve your SEO integrity, minimizing any disruptions to your rankings while maximizing speed and scalability.

Ready to unlock your website’s full potential? Contact us today to discover how our professional migration services can transform your site, improve efficiency, and deliver lasting results.

Automobile Product Configurator for WordPress: Interactive Personalization

Personalization is changing the game in the automobile and gear world. Customers don’t just want products—they want products that match their style. The personalized vehicle market alone is set to hit $25.7 billion by 2033, illustrating how important it is to give buyers interactive, customizable options. To meet this demand, automobile product configurator has emerged as a powerful tool. It lets users customize their products and see the changes in real time, making the whole experience more fun and engaging.

In line with this trend, our ecommerce experts built a custom WordPress plugin for a client’s motorbike online store. It’s designed to be intuitive and interactive, allowing customers to explore all kinds of personalization options and see exactly how each choice will look. This makes it easier for them to make decisions and speeds up the buying process.

In this blog, we’ll walk you through the key features of our WordPress product configurator and show how businesses can benefit when they hire WordPress developers for custom interactive solutions.

What is an automobile product configurator?

An automobile product configurator is a smart, interactive tool. It lets users customize vehicles and gear the way they want. Colors, finishes, accessories, decals—be it anything. You can visualize all the changes in real time. It’s like a virtual preview of your personalized ride—no surprises, no guessing.

Here’s why it’s essential:

  • Market Trends: People love personalization. Cars, bikes, and gear that reflect their personality and style are in high demand. They give customers a fun, hands-on experience that regular online stores just can’t match.
  • Customer Expectations: These days, shoppers want more than just options. They want a smooth, tailored experience. They want to see their choices instantly and create something that feels uniquely theirs. Skip the interactive tools, and you might lose their attention—and their business.
  • Problems with Traditional Customization: Old-school customization can be a hassle. Static images, brochures, or just trying to visualize the final result. That leads to mistakes, confusion, and unhappy customers. It’s also slow and hard for businesses to scale.

With modern ecommerce personalization tools, businesses can offer engaging, real-time customization. Customers get to experiment, see results instantly, and make confident choices, ultimately driving greater customer satisfaction and loyalty.

What are the Key Features of an Automobile Product Configurator?

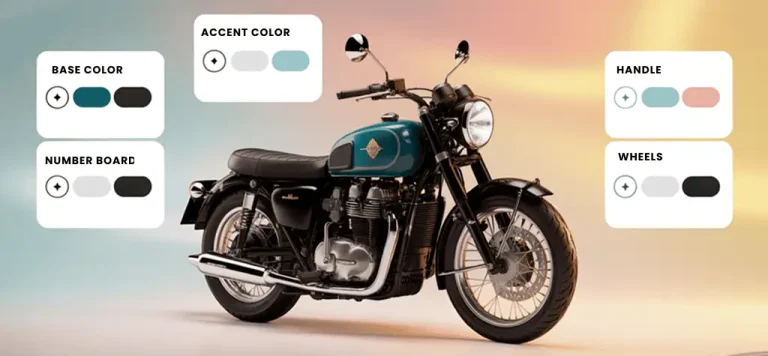
At The Brihaspati Infotech, we built a custom WordPress Automobile product configurator plugin for a bike and gear platform, giving riders the power to design their bikes and accessories in real time. From picking base colors and accent shades to adding custom logos and stickers, everything updates instantly.

It’s a fully personalized shopping journey, allowing riders to take full control of their designs. Every product reflects its unique style and identity. With real-time Visualization and an easy-to-use interface, we completely transformed the online shopping experience—engaging users like never before.

Here’s a breakdown of the key features that make this personalized experience stand out:

1. Real-Time Visualization

  • Riders can experiment with base colors, accent shades, and number board colors. 
  • The preview updates instantly with each selection. 
  • Customers see exactly how each choice affects the final product. This builds confidence in their selections.
  • The configurator operates similarly to a Visual Product Builder, offering instant previews and interactive design options for each vehicle variant.

2. Personalized Rider Identity

Personalized Identity in Automobile Product Configurator
  • The plugin lets riders add their name and racing number to the bike preview.
  • This personal touch strengthens the rider’s bond with the product.
  • Each design is one-of-a-kind.

3. Logos & Stickers Upload

Personal logo and sticker uploads
  • Riders can upload their logos, decals, or any graphic they want.
  • Whether it’s custom branding or personal flair, this feature allows riders to express themselves and make their bike stand out.

4. Optional Add-Ons to Automobile Product Configurator

  • To make things even more personalized, the configurator includes optional add-ons like mini boards, Kiwi Grip frame tape, and different finish types.
  • These options let riders fully tailor their bike to fit their preferences.

5. Customization Notes

  • A dedicated notes field allows riders to leave special requests or instructions.
  • This ensures every detail is captured and executed exactly as envisioned, making for a smoother design process.

6. Mega Menu Navigation of Automobile Product Configurator

Automobile Product Configurator Menu
  • The WordPress plugin comes with an intuitive mega menu, making it super easy to browse all customization options. 
  • Riders can quickly find what they’re looking for, making the experience seamless and user-friendly.

7. Visually Engaging Homepage Design of Automobile Product Configurator

  • The homepage has a clean, modern look that grabs attention right away and makes it easy for users to navigate the site.
  • It’s built to keep users engaged and make the whole experience smooth and enjoyable.

Ready to take your online store to the next level with real-time visualization? Hire WordPress developers today and bring your personalized eCommerce platform to life.

How an Automobile Product Configurator Can Boost Your Ecommerce Business?

Implementing an automobile product configurator in your eCommerce platform brings big advantages—for both your customers as well as your business. By offering a personalized, interactive experience, you can drive higher engagement, more sales, and improved customer satisfaction. Let’s take a look at how a real-time visualization can benefit your business and improve the customer journey.

BenefitDescription
Improves User EngagementReal-time updates keep customers engaged, letting them spend more time customizing bikes and connecting with the product.
Eliminates GuessworkInstant visualizations eliminate guessing, enabling faster, confident decisions and happier customers.
Enhances PersonalizationCustom names, logos, and colors make bikes feel personal, boosting satisfaction, loyalty, and connection.
Boosts cross-product salesBrowsing related products like grips and frame tapes boosts visibility and purchase opportunities.
Streamlined ProcessAutomobile Product configurator streamlines personalization, helping customers make confident purchases
Higher Conversion RatesReal-time visualization boosts customer’s confidence, and they make faster decisions.
Competitive AdvantageOffering a customization tool gives you an edge. Customers are more likely to pick your brand.
Real-World MetricsProduct configurator has been proven to increase engagement, drive higher conversion rates, and boost repeat purchases.

How Are Product Configurators Used Across Industries?

Product configurator software isn’t just limited to automobiles. They are increasingly being adopted across various industries to enhance customer experience, boost engagement, and drive sales. Here’s how different sectors can leverage product configurator for their benefit:

E-commerce and Retail

  • Retail industries like fashion, furniture, and accessories use product configurators to offer personalized items. 
  • Customers pick their colors, materials, and design features. This makes shopping feel more personal, leading to higher engagement and more sales.
  • For example, 3D configurators in apparel allow real-time garment customization. Shopping online just got more fun and interactive.
Product configurator in apparel ecommerce
Product configurator in Home & Interior design

Home and Interior Design

  • Product configurators are also being used in home and interior design, where users can customize home layouts, kitchen setups, or office furniture.
  • Choose your design, color, finish, and materials, and create your personalized interactive space.
  • For instance, the use of a custom wall art design tool that offers personalized map prints.

Manufacturing and Industrial Products

  • In sectors like construction and machinery, product configurators allow clients to customize complex products.
  • You can pick materials, sizes, and parts to match exact needs. This speeds up the process and ensures the product is perfect. 
  • Think of trailer manufacturing—A 3D trailer configurator offers custom-built products, delivered efficiently and accurately.
Product configurator in manufacturing industry
Product configurator in electronics & Technology

Technology and Electronic

  • Tech companies use product configurators to let customers build their own devices—computers, laptops, smartphones.
  • It lets you choose the spare parts or hardware components: processors, memory, and storage. Customers get highly specialized products built just as per their needs. 
  • For example: A PC configurator lets customer configure their custom PC just as per their business requirements.

Implementing a product configurator can transform your customer experience, drive higher engagement, and boost sales. Looking to offer highly customizable products? Partner with an experienced ecommerce development company to help you create an advanced product configurator that enhances your online store and drives long-term growth.

Frequently Asked Questions

How Much Does Custom Automobile Product Configurator Development Cost?

The cost of developing a custom Automobile product configurator depends on a few key factors:
Level of Customization (think color options, design elements, and any special features you want)
Complexity of the Product (more options and features will have more complexity)
Real-Time Visualization (basic rendering vs. high-quality, real-time rendering)
Platform Integration (Magento, WooCommerce, Shopify, etc.)
Additional Features (like logo integration, stickers, or extra add-ons)
Want an exact quote? Schedule a consultation

Can a product configurator be integrated with any e-commerce platform?

Yes. At The Brihaspati Infotech, we 
– Specialize in integrating ecommerce product configurator into leading platforms like Magento, WooCommerce, and Shopify.
– Support both custom-built solutions and third-party integrations.
– Optimize performance to ensure seamless functionality and fast loading times.
– Provide tailored implementation to meet your unique business needs.
Looking to configure a product configurator that works for your store? Partner with our experienced ecommerce development company for tailor-made solutions.

Is a product configurator suitable for industries beyond automobiles?

Yes! Product configurators aren’t just for automobiles. They can be used across many industries like fashion, furniture, home décor, electronics, and even industrial products. If your business wants to offer customized or personalized products, a product configurator is a perfect fit.
Looking to enhance your ecommerce store with personalized shopping experiences? Explore our ecommerce personalization tools to create an interactive, engaging platform that drives customer satisfaction and boosts sales.

How Long Does Custom WordPress Product Configurator Development Take?

The timeline for developing a custom Automobile product configurator depends on the following factors:
Level of Customization 
Number of Product Variants 
Real-Time Visualization and Rendering 
Platform Integration
Testing and Optimization
On average, a custom WordPress product configurator project can take 4 to 6 weeks.
Need a more specific timeline? Contact us

Boosting Sales with Automobile Product Configurator

Adopting an automobile product configurator for your online store isn’t just about adding a feature—it’s about transforming the way customers experience your brand. By offering real-time design customization, you can increase engagement, reduce decision fatigue, and gain valuable insights into customer preferences, all while enhancing your product offerings.

Our ecommerce development company specializes in developing custom product configurator solutions tailored to your specific business needs. Whether it’s for automobiles, bikes, or any other product, we create seamless, interactive experiences that integrate perfectly with your eCommerce platform—be it Magento, WooCommerce, Shopify, or any other.

Ready to elevate your online shopping experience? Contact us and explore how a custom product configurator can boost customer satisfaction, sales, and brand loyalty.


WordPress Appointment Plugin for Property Management: Automate Compliances

Property compliance is critical for UK landlords and property managers. Managing inspections and scheduling maintenance often means juggling multiple service providers.

Imagine putting everything together in one place for landlords. We recently built a custom WordPress appointment plugin for a UK client that provides property compliance services. Landlords can now schedule inspections and maintenance seamlessly—all with a single platform.

Looking to automate property compliance for your clients? Our WordPress developers can help you through, from initial planning to platform development and ongoing maintenance.

This blog explains WordPress appointment booking plugin development process and how different challenges were resolved to streamline property compliances for UK landlords.

Let’s get started.

WordPress Appointment Plugin Features

Our custom WordPress appointment plugin centralizes booking of various compliance services for property owners and managers. Here’s what we built:

1. Multi-Step Booking Form

A guided, multi-step booking form helps landlords select multiple compliance services in one go. This ensures all services are scheduled without any problem.

2. Responsive & User-Friendly Interface

The platform works seamlessly on desktops, tablets, and mobile devices. So, landlords get a smooth, intuitive booking experience anytime, anywhere.

3. Outlook Calendar Integration

Bookings automatically sync with Microsoft Outlook Calendar. Any update and/or cancellation sync in real time.

4. Chat Feature Customization

Chat conversations are directly linked to the booking IDs. This enables landlords and service providers to communicate and resolve issues quickly.

5. Optimized Performance

Optimized JavaScript and caching ensure multi-step forms load quickly and interactions remain smooth. This increases more complete bookings and reduces drop-offs.

Build WordPress Appointment Plugin for Property Management: Our Case Study 

At The Brihaspati Infotech, we helped a UK-based property compliance provider with a powerful WordPress appointment booking plugin. The platform simplifies scheduling multiple compliance services, reducing operational headaches for landlords.

Here’re the key steps to the WordPress booking platform development: 

Step 1: Define the Booking Flow

Service Booking flow

We mapped how landlords move from choosing services to securing service appointments. Also, we set rules that prevent common issues, like double-bookings or missing details.

  • Created a dedicated “Booking” page inside WordPress.
  • Listed services (EICR, Gas, Fire, EPC) with durations, prices, lead times, and blackout dates.
  • Mapped the sequence: Services → Property → Date/Time → Contact → Review.
  • Used a shortcode so the booking flow can appear on any WordPress page.

Step 2: Created Custom Post Types for Services

Create custom post types for WordPress plugin

WordPress treats everything as a post by default. So, we created Custom Post Types (CPTs) to organize services and bookings properly.

  • Services CPT: stores service name, category (gas/electrical), price, and duration.
  • Bookings CPT: captures customer details, property info, selected service, and time slot.
  • Used Advanced Custom Fields (ACF) for structured fields, avoiding the limitations of WordPress’s standard post editor.

Step 3: Multi-Step Booking Form (Custom WordPress Appointment Plugin)

Instead of using off-the-shelf appointment scheduling software. We built a custom WordPress appointment plugin for a flexible, multi-step booking form.

  • Generates a flexible, multi-step form via shortcode.
  • Used PHP (backend) + JavaScript (frontend) to validate steps.
  • Configured each step to auto-save into the booking CPT so no data is lost.

Step 4: Generate Available Slots

Check available slots for appointment

We ensured users only see timeslots that are available for booking.

  • Added custom logic in the WordPress appointment booking plugin.
  • Pulled business hours and blackout dates from WordPress settings.
  • Used WordPress transients (built-in caching) to load slots fast without slowing the site.

Step 5: Outlook Calendar Integration

Outlook Calendar Integration

We automated the compliance service booking by integrating Outlook Calendar.

  • Registered an app in Microsoft Azure and saved API credentials in WordPress.
  • Created a plugin function to push booking data to Outlook via Microsoft Graph API. 
  • Stored the event_id in booking CPT meta so WordPress can later update/cancel the event.

Step 6: Customize Chat & Notifications

customized chat for WordPress appointment plugin

We made communication feel personal and timely.

  • Modified an existing WordPress chat plugin to include booking IDs.
  • Set up WP Mail for confirmation emails + reminders using booking CPT data.
  • Configured WP-Cron to schedule reminder emails, automatically pulling data from the booking CPT.

Step 7: Build Custom Admin Dashboard

Build Dashboard for WordPress appointment plugin

Landlords and operations teams needed an overview of what’s happening.

  • Created a custom admin page listing all bookings.
  • Added filters (date range, service type, status) using WP’s built-in list tools.
  • Enabled one-click actions: reschedule, cancel, confirm, linked to CPT meta.

Step 8: Optimize Performance

We optimized various parameters to speed up the site and generate more completed bookings.

  • Installed W3 Total Cache for page and object caching.
  • Deferred non-critical JS (chat, analytics) via WordPress enqueue system.
  • Minified CSS/JS and used WebP images for quicker downloads.

Step 9: Launch & Monitor WordPress Booking Platform

Before going live, we 

  • Tested booking flow with different service combinations on staging.
  • Migrated to live site with backups.
  • Added Google Tag Manager and WordPress analytics plugin to track booking funnel drop-offs.

Our WordPress appointment plugin turned a clunky property compliance scheduling into a smooth, reliable workflow. This resulted in a 25% increase in bookings within 6 months of its launch.

WordPress Appointment Plugin Development Challenges & Solutions

Building the WordPress booking platform wasn’t without some challenges. Here’s how we addressed each to drive optimal performance and reliability.

1. Multi-step form logic & cross-step validation

Landlords often book multiple services at once. But only one date/time slot should be selected for the combined duration. A standard form plugin can’t handle these restrictions.

How we solved it:

  • Built a custom multi-step form plugin instead of relying on off-the-shelf form builders.
  • Applied JavaScript validation at each step so users couldn’t move forward with invalid selections.
  • Stored data in the WordPress database to reduce errors and abandoned forms.

2. API Data Mapping to Outlook Calendar

Outlook Calendar requires bookings in a very specific data format (ISO timestamps, structured event fields). If the data isn’t mapped correctly, events don’t appear or sync properly.

How we solved it:

  • Wrote a custom integration module to translate booking data (name, address, services, time) into Outlook’s required format.
  • Saved Outlook’s event_id in the WordPress booking record so updates/cancellations stayed in sync.
  • Managed edge cases like time zone differences to prevent scheduling errors.

3. Performance Bottlenecks

The multi-step form handled service durations, slot availability, and step by step updates. This slowed the website speed, especially on mobile.

How we solved it:

  • Used WordPress transients (built-in caching) to pre-store available slots for instant loading.
  • Installed W3 Total Cache to speed up page loads and reduce server time.
  • Optimized form logic by moving heavy calculations to the server-side.

4. Data Security Concerns

Booking forms collect sensitive information such as property addresses and tenant contacts. Exposing the confidential data could result in potential legal issues.

How we solved it:

  • Enforced role-based access so only authorized staff could access booking details.
  • Used WordPress nonces and input sanitization to block malicious form submissions.
  • Enforced HTTPS encryption and masked sensitive data in admin logs.

Want a WordPress appointment booking plugin that wins you more clients? Get a custom quote today

Frequently Asked Questions

1. How can I ensure tenants receive timely appointment confirmations?

Missed notifications can affect property compliance schedules. With a WordPress appointment plugin, we can integrate automated emails, SMS alerts, and calendar syncing into your online booking system. This keeps property managers and tenants informed throughout.

2. Can I see all bookings in one place without switching between calendars?

Switching between multiple calendars can be time consuming. We built a centralized admin dashboard with Outlook/Google Calendar integrations, giving property managers a single view of all bookings and statuses.

3. How do I make sure sensitive property data is safe?

We are committed to delivering secure property compliance platforms. All booking data is encrypted both in transit and at rest. Role-based access ensures that only authorized staff can view sensitive data. We also implement nonces, HTTPS, and secure database practices to prevent unauthorized access.

4.  How long does it take to build a WordPress appointment plugin?

Typically, a fully functional WordPress appointment booking plugin is delivered in 4–6 weeks. However, we calculate the development timeline after studying the project needs such as the number of compliance services, integrations, and features you need.

Contact us and request an estimated project timeline.

5. What is the cost to build a custom WordPress appointment booking plugin?

The WordPress plugin development cost depends on different factors, including
1. The project complexity, such as the number of service types
2. Integrations requested like Outlook/Google Calendar
3. Custom dashboards

We provide a tailored estimate after reviewing your project requirements. Contact us today.

6. Can I scale the platform later to add more property compliance services?

Absolutely. Our WordPress booking platform is built for scalability. As your clientele grows, we can add new services, properties, and automated workflows without rebuilding from scratch.

Ready to Automate Property Compliance with WordPress Plugin? 

Property compliance simplified with a custom WordPress appointment plugin. The property compliance platform enables landlords schedule inspections and other property management services, fast and easy.

At The Brihaspati Infotech, we convert complex workflows into simple, scalable plugins on WordPress, Shopify or other CMS platforms. Whether you manage property compliance or any other service-based business, we can create custom booking platforms and software solutions for your business.

Looking to build a booking platform for your industry? Let’s discuss your project today.

Custom LMS Development with WordPress: Build eLearning Platform

Running a WordPress quiz website is a great way to create engaged learners. WordPress quiz website UX design contributes to attracting high-intent organic traffic for generating revenue. However, today’s learners seek structured learning experiences and not just one-off educational tests.

That’s where custom LMS development comes into the picture. For businesses, it means building an eLearning platform to generate business revenue. Whether you’re creating LMS with WordPress or building your own LMS for corporate purposes. Our custom software development company can help you with end-to-end business solutions.

Our blog walks you through how to transform a WordPress quiz site into a feature-rich learning platform, helping businesses make a profitable decision. Let’s get started.

Why Upgrade from WordPress Website to Learning Platform?

why upgrade to LMS from WordPress website?

A quiz-only WordPress website has limitations when it comes to generating long-term business value and growth. Hire WordPress developers and turn your quiz site into a feature-rich, custom LMS to unlock several advantages:

  • Structured Learning Experience: Students progress through different lessons and course modules.
  • Progress Tracking – Students can monitor their performance, while admins get insights into learner activity and course completion rates.
  • Credible Certificates – Digital badges or certificates provide learners with desired recognition.
  • Recurring Revenue Models – Admins can offer subscriptions, memberships, or bundled courses.
  • Community and Engagement – Discussion forums, gamification, and leaderboards create a more interactive learning environment for students.

While a quiz website captures interest, an eLearning platform builds a loyal and scalable market to scale your business.

Core Features of Custom LMS

A robust LMS software elevates user experience and scale with your business. Here are some key features that make LMS a dedicated business solution for edtech startups and enterprises.

1. Course Creation & Management

LMS dashboard- course creation and management

A strong LMS gives admins and instructors control over how learning content is structured and delivered.

  • Course Builder: Create and organize courses with multimedia, quizzes, assignments, etc.
  • Content Management: Easily upload, update, and manage lessons or modules.
  • Calculated Learning Journeys: Design sequential curriculums that guide learners.

2. User Profiles & Roles

Different stakeholders need different levels of access to the LMS. Thus, it’s important to create role-based permissions in the platform.

  • Role-Based Access: Define roles like admins, instructors, and students with specific permissions.
  • User Profiles: Track learner activity, course history, and achievements in one place.
  • Automated Enrollment: Simplify course sign-ups for individuals.

3. Progress Tracking & Analytics

Progress tracking using LMS

Learners and admins both need visibility into performance and outcomes.

  • Performance Metrics: Monitor completion rates, quiz scores, and progress of students.
  • Reports & Dashboards: Visualize learning data for actionable performance insights.
  • Assessment Tools: Build exams, quizzes, and assignments to measure knowledge retention.

4. Community & Collaboration Features

LMS software enables students to interact with other leaners and instructors.

  • Discussion Forums: Create dedicated spaces for learners to share ideas and ask questions.
  • Messaging: Direct communication modes between students and instructors.
  • Notifications: Automated alerts for payment deadlines, new lessons, or course updates.

5. Mobile Responsiveness

Modern learners expect flexibility to use the platform across multiple devices.

  • Responsive Design: Ensure seamless access on desktops, tablets, and smartphones.
  • Mobile Apps: Extend learning through dedicated Android and iOS apps.
  • Offline Access: Allow learners to download lessons or resources for offline study.

6. Payment Integration

An LMS enables users to make safe and secure payments.

  • Payment Gateways: Integrate Stripe, PayPal, or WooCommerce for seamless payments.
  • Payment Models: Offer one-time purchases, subscriptions, or freemium access.

7. Gamification

A gamified learning platform motivates individuals to perform and get rewarded.

  • Leaderboards: Encourage learners to top the list and lead.
  • Badges & Points: Award special points for achieving milestones.
  • Reward Points: Motivate learners to complete more courses.

Custom LMS Development with WordPress: How to Build an LMS?

7 Step process of custom lms development with wordpress

Turning a WordPress quiz website into a full-fledged learning platform requires careful planning and execution. Here are key steps of the custom LMS software development process:

Step 1: Evaluate Current Website Setup

We start with WordPress website audit to find how quizzes are built and whether the current setup is compatible with LMS integration.

  • Review installed plugins (e.g., WP Quiz, Quiz Maker, and WPForms).
  • Examine hosting and server capabilities for handling LMS workloads.
  • Identify performance gaps that might limit platform scalability.

Step 2: Custom LMS Development

We build a custom LMS tailored to business workflows, branding, and enterprise-level needs. Our full-stack developers ensure flexibility, performance, and long-term scalability.

Frontend (React.js): Create intuitive dashboards and course libraries with reusable components.

Backend (Node.js + Express) → Handle course management, quiz submissions, user authentication, and progress tracking through secure, scalable APIs.

Database (MySQL) → Store learner data including user profiles, quiz scores, enrollments, and certificates.

Integration Layer → Connect with third-party tools such as like Stripe/PayPal for payments.

Advanced Features → Add gamification modules, certificates, AI-driven personalization, and multilingual support for global reach.

Scalability & Security → Deploy on AWS, GCP, or Azure with CI/CD pipelines, ensuring compliance (GDPR, HIPAA).

Step 3: Migrate Existing Website Data

Our custom website development services ensure website data is migrated safely into the new framework.

  • Export quiz data (questions, scores, user attempts) from current plugins.
  • Map old quiz formats into LMS-compatible structures.
  • Migrate user records (profiles, history, achievements) into the new database (MySQL/MongoDB).
  • Validate integrity of learner progress and ensure no duplication or data loss.

This ensures learners retain their study history, and admins preserve valuable data analytics.

Step 4: Create Intuitive User Experience

Our React.JS developers rebuild the UI to deliver structured, engaging learning journeys.

  • Student Dashboards: Display enrolled courses, quiz history, certificates, and progress metrics.
  • Instructor Dashboards: Tools to create lessons, manage quizzes, track learner engagement.
  • Course Libraries: Searchable and filterable modules that link quizzes directly with lessons.
  • Responsive Design: Optimized layouts for desktop, tablet, and mobile.

Our UX design creates an immersive learning platform experience for all the users.

Step 5: Integrate Additional Features

We add feature-rich modules that elevate learner engagement and monetize the platform.

  • Payment Gateways: Stripe, PayPal, or WooCommerce for subscriptions and course sales.
  • Certificates & Badges: Auto-generate digital recognition after course or quiz completion.
  • Video Learning: Embed recorded video content or enable live sessions with Zoom/Google Meet.
  • Gamification: Points, leaderboards, and achievements to improve learner retention.

The feature-rich LMS creates a more dynamic user experience.

Step 6: Testing & Quality Assurance

Before launch, we rigorously test custom LMS software for scalability, accuracy, and reliability.

  • Cross-browser & cross-device testing: Deliver consistent experience on different devices.
  • Load Testing: Simulate heavy traffic to verify performance under scale.
  • Functional Testing: Validate quiz scoring, progress tracking, certificates, and payments.
  • Security Audits: SSL setup, database hardening, and compliance checks (GDPR, HIPAA if needed).

Step 7: Launch & Post-Deployment Support

We don’t stop at deployment. Our custom LMS development team ensures the learning platform grows with your business needs.

  • Secure Hosting → Deploy on AWS/GCP/Azure with scalability in mind.
  • Backups & Monitoring → Ensure uptime and quick recovery.
  • Continuous Support → Bug fixes, new feature rollouts, plugin/API updates.
  • User Feedback Loop → Collect insights from learners and admins to improve the platform iteratively.

Post-launch, your LMS stays optimized, secure, and future-proof.

Business Benefits of Custom LMS Development

Benefits of building custom LMS

Converting a WordPress quiz site into a dedicated eLearning platform delivers clear business value.

1. Increased User Engagement & Higher Course Completion

  • Structured learning experiences help students stay motivated.
  • Features like gamification, personalized course recommendations, and progress tracking encourage learners to complete courses.

2. Extra Growth Opportunities

  • Go beyond selling quizzes. Monetize with subscriptions, memberships, and premium courses.
  • Offer freemium models where basic quizzes are free but advanced courses require payment.

3. Stronger Branding Image

  • Unlike relying on third-party e-learning marketplaces, a custom LMS lets you to create and own the brand experience.
  • Tailor design, features, and workflows to reflect your unique value proposition.

4. Scalability for Growth

  • A custom LMS can adapts as your learner base grows.
  • Add new courses, support new regions, and integrate enterprise-grade features like compliance training.

5. Data-Driven Decisions

  • With analytics dashboards, admins can track learner performance, course popularity, and overall platform ROI.
  • These data insights help refine courses, marketing strategies, and revenue models.

With custom LMS development, you are building a smart eLearning platform to multiply user engagement and conversion.

Frequently Asked Questions

1. How much does it cost to build an LMS? 

A plugin-based LMS (like Tutor LMS) can be budget-friendly. However, custom LMS development involves custom features such as gamification, video integration and AI.
We calculate the cost for developing a custom LMS depends after studying several factors, including
1. The solution’s architecture
2. The functional scope
3. The development tech stack
4. The custom requirements

Contact Us

2. How long does custom LMS development take?

Typically, simple quiz website to LMS upgrades can take 4–6 weeks. However, custom LMS builds with advanced features (certifications, payments, live classes) may take 6-10 weeks.

3. Do I need custom development, or will WordPress LMS plugins suffice?

WordPress LMS plugins are great for quick setups. However, custom LMS development is recommended for businesses looking for a unique and scalable learning platform.

4. Can I migrate bulk quizzes into the LMS?

Yes, absolutely. Quizzes, user data, and results from your current site can be migrated into the LMS framework without losing progress or content.

5. Can you build LMS from a website running on Shopify or any other CMS?

Yes, absolutely. We can build LMS from websites made in Shopify or any other CMS.

Ready to Build your own LMS?  

A custom LMS transforms user engagement into structured learning, measurable progress, and long-term business growth.

At The Brihaspati Infotech, we build custom LMS software for your business goals. Whether you’re looking to migrate from existing CMS or build a custom learning platform from scratch, our web development team delivers top-tier business solutions.

Ready to launch your own e-learning platform? Book your free strategy call today.

WordPress Quiz Website UX: 5 Proven Fixes to Multiply Conversion

A WordPress quiz website UX design can make or break sales. With research showing that 88% of users won’t return after a poor experience, businesses selling online quizzes can’t afford to ignore UX.

One of our US-based clients — an established seller of online educational quizzes — approached us after witnessing stagnant sales despite high website traffic.

At The Brihaspati Infotech, we implemented WordPress website redesign with five targeted UX fixes. The results were incredible and mostly immediate: increasing browsing times, improved retention, and a noticeable spike in quiz purchases.

The blog breaks down the five website UX design improvements and their impact in turning casual visitors into paying customers. Whether you’re building or redesigning quiz website, our WordPress developers can help with practical UI/UX solutions.

Let’s get started.

Why UX Matters for WordPress Quiz Websites?  

Unlike high-ticket e-commerce sites, where buyers may research online for days or more, entertainment shoppers make quick decisions. If their path to purchase is not straightforward, they’ll leave and look elsewhere.

  • Impulse purchases are growing: A McKinsey study shows that entertainment and leisure products have one of the shortest decision-to-purchase windows online.
  • Checkout friction means lost sales: Salesforce research indicates that 74% of consumers are likely to switch brands if the purchasing process is too difficult.
  • Backend UX is important: If your team struggles to update products quickly, your store will feel outdated, costing you repeat sales.

Our US client was struggling with non-paying organic traffic. The challenge was not to increase market demand but improve WordPress quiz website UX design without undergoing complete overhaul.

5 UX Fixes for WordPress Quiz Websites 

5 UX Fixes for WordPress quiz Websites

At The Brihaspati Infotech, we conceptualized and implemented WordPress quiz website UX solutions for the US client. Our website developers worked through details to redesign WordPress website, driving high-intent users for conversions. 

UX Fix #1: Inline Checkout with Discount Integration

Earlier, visitors were redirected to another page — or even off-site — to complete their purchase. This broke the buying momentum and reduced trust.

Inline Checkout for WordPress website

Our Solution:

  • Integrated Stripe API directly into the product page so checkout happened instantly, without a redirect.
  • Added discount popup into the checkout process, encouraging impulse purchases without sending shoppers to a separate page.
  • Redirected shoppers to a custom “Thank You” page instead of the default WooCommerce confirmation page.

Keeping users on the same page from significantly reduced drop-offs. Our WooCommerce one-page checkout solution can improve user experience and convert into real product sales.

Why It Matters:
For low-ticket fun products like online quizzes, every extra click is an exit opportunity. Inline checkout not only shortens the purchase path but also builds trust.

UX Fix #2: Custom Product Filters

With multiple quiz packages, users had to scroll the website endlessly to find the right one.  This potentially exhausted users and increased bounce rates. According to Nielsen Norman Group, poor product findability is one of the top reasons for e-commerce abandonment.

Our Solution:

  • Built custom product filter allowing shoppers to sort quizzes by category, name, and other key attributes.
  • Designed the system so matching products appeared at the top of the shop page instantly.

Shoppers could find the quiz pack they wanted within seconds. Whether it was a sports-themed trivia night or a seasonal special, the expedited product discovery resulted in faster checkouts and reduced drop-offs.

Why It Matters:
In entertainment niches, users rarely browse with patience and thus brand loyalty is hard to find. So, act smartly and implement calculated WordPress quiz website UX design solutions like ours. 

UX Fix #3: Simplified Backend Product Management

The client’s admin team struggled to update product details, especially custom fields, which slowed down quiz launches. With a growing product catalog, it was difficult to scale up the business.

Our Solution:

  • Enhanced the product detail interface so all custom fields could be updated in one place.
  • Added a manual review system for quizzes, allowing the business to approve and showcase reviews.

Admins could now launch new quizzes faster, keeping the store fresh and aligned with current events. Quality control over reviews builds customer trust and encourage more purchases.

Why It Matters:
Backend UX is often ignored, but it directly impacts sales velocity. If your team can update products for holidays, events or trending topics, you can tap into the rising market demand in real-time. 

UX Fix #4: Custom Product Order Logic

WooCommerce’s default sorting logic caused product display issues when multiple quizzes shared the same priority order. This led to a disorganized store layout and inconsistent user experience.

Our Solution:

  • Modified product ordering logic so that items with identical order numbers swapped positions logically without breaking the layout.

The store could now feature seasonal quizzes, promotions, or best-sellers without backend issues. Thus, maintaining a clean, professional, and curated look.

Why It Matters:
Store layout impacts buying behavior. Research shows that featured and top-row products receive significantly more clicks and conversions than lower-listed ones.

UX Fix #5: On-Site Checkout with Post-Purchase Engagement

Traditional eCommerce checkout flows often redirect to third-party payment sites, causing users to lose context and, in some cases, confidence. 

Our Solution:

  • Designed a checkout flow that never left the store’s domain.
  • Created a post-purchase experience with upsell prompts and related quiz recommendations (via custom ‘Thank You’ Page).

Shoppers completed purchases with more confidence. Our client received more opportunities to drive secondary sales without spending extra on marketing.

Why It Matters:
For impulsive buyers, trust is fragile. A seamless, on-site payment experience removes doubt and keeps customers in your brand ecosystem.

Our custom web development company helped drive meaningful traffic with meticulous WordPress quiz website UX design solutions. Do you want anything similar or looking for custom WordPress website redesign?

Start with website UX audit today

Measure Impact of WordPress Quiz Website UX Design Fixes

A UX fix is only as good as the data proving it works. For this small US-based quiz website, we monitoring some key website performance metrics before and after UX enhancements:

Results of Quiz Website UX fixes

Checkout Completion Rate

Jumped from 42% to 68% after inline checkout was added. Fewer shoppers abandoned the carts once we added inline checkout with Stripe integration.

Time to Purchase

Reduced from 6 minutes to 3 minutes, indicating faster product discovery and successful online transactions.

Filter Usage Vs Conversions

Shoppers using the new custom product filters converted 26% in comparison to the previous 12%, leading to higher product sales.

Repeat Purchases

Smooth backend and frequent product releases increased loyal buyers from 18% to 25%, a noticeable rise in market trust.

Industry-Backed Enhancements for WordPress Quiz Website UX

Here are some practical UX enhancements that can take any quiz website on WordPress to next level: 

Industry-driven UX fixes for WordPress  Websites
  • Bundles & Cross-Sells: Selling themed quiz packs together can raise average order value by 10–30% or even more.
  • Timed Offers: Using countdown timers for limited-edition quizzes creates urgency and pull more shoppers for impulse purchase.
  • Subscription Models: Offer monthly quiz packs at a discounted rate to encourage long-term customer retention.
  • Event-Based Promotions: Tie quiz sales to events like sports finals or seasonal holidays for extended reach and higher relevance.

Recommended Practices for WordPress Quiz Website UX Design

Implementing UX fixes is a strong start, but maintaining and continuously improving user experience will keep your quiz website competitive.

Recommended UX practices to design WordPress websites

1. Streamline Checkout Experience

A cluttered checkout can negatively impact conversions. By reducing form fields, offering guest checkout, and keeping users on-site for payment, you make the purchase process simple and fast.

2. Prioritize Mobile-First Design

With more than 60% of quiz purchases happening on mobile, optimizing for smartphones is essential. Thumb-friendly buttons, clear tap targets, and multi-device compatibility ensure a smooth journey for mobile shoppers.

3. Keep Navigation Simple and Intuitive

Users should never feel lost or directionless while shopping online. Clear categories, smart filters, and breadcrumbs help customers find quizzes quickly and retrace their steps with ease.

4. Regularly Update Content and Offers

A static quiz catalog quickly feels outdated. Seasonal launches, limited-time bundles, and showcasing best-sellers keep your store fresh and encourage repeat visits.

5. Implement Data-Driven UX Improvements

Every customer action leaves a clue. By monitoring filter usage, checkout abandonment, and using heatmaps, you can quickly identify friction points and refine the experience.

6. Maintain Brand Consistency

From checkout pages to confirmation emails, every touchpoint should reflect your brand. Consistency builds trust, avoids confusion, and reinforces loyalty long after the purchase is complete.

With the said website UX design practices, you can improve conversion gains and future proof your WordPress website against evolving customer expectations.

Frequently Asked Questions

1. How to determine if my WordPress website needs to be redesigned?

There are a few signs that indicate your WordPress website UX design needs improvements:
1. High bounce rates and shopping cart abandonment indicate checkout friction.
2. Less repeat visitors suggest your site isn’t engaging enough for return traffic.
3. Mobile performance issues — Over 60% of online purchases happen on mobile. If your WordPress quiz or eCommerce site isn’t mobile-friendly, you’ll lose conversions.
4. User reporting issues such as slow website or checkout crashes. 

You can use Google Analytics and UX tools like Microsoft Clarity to determine user behavior across your site. Let’s schedule website UX audit and get started.

2. How much does WordPress website redesign cost?

We calculate WordPress website redesign cost after studying project scope:
1. Minor UX optimizations: checkout fixes, clear menu, responsive design.
2. Full WordPress redesign with custom features (e.g. quiz integrations, payment flows).

Contact us and request a custom quote.

3. How early can I expect results after WordPress quiz website UX design edits?

UX improvements often produce noticeable results within weeks, especially if you’re fixing a major design flaw like a multi-step checkout.  However, there is no fixed time period to it.
1. Quick results (e.g., inline checkout) can drive conversion rates faster than expected. 
2. Major changes such (e.g., custom filters) may take 1–3 months to show real impact. 

What can I expect after website UX design enhancements?

With a strong WordPress website UX design strategy, you can expect:
1. Increased conversions: More users buying quizzes instead of abandoning carts.
2. Higher average order value (AOV): Improved navigation and upsell opportunities add to the order value. 
3. Greater customer satisfaction: A seamless shopping experience creates happy and loyal customers.
4. Better repeat business: Features like personalized recommendations compel customers to return.

Would you like to learn more? Contact us

5. Is it worth investing in UX if my WordPress website is getting enough traffic? 

Yes. Many WordPress sites rank well and attract steady visitors but still fail to convert them into paying customers. 
Even a 1–2% increase in conversion rate can translate into
1. Thousands of dollars in extra revenue.
2. Reduced customer acquisition costs
3. Increase in repeat purchases. 
4. Winning customer loyalty and competitive advantage

Start with WordPress website UX audit and decide what’s right for your business.

Ready to Redesign WordPress Website? 

A successful WordPress quiz website isn’t just about great content — it’s about delivering a buying experience so smooth that customers are encouraged to purchase, return, and buy again.

The five website UX design fixes above show how targeted solutions — from inline payments to better product filtering — can make a measurable difference in conversions. All that without a complete WordPress website redesign.

If you want to attract valuable and sustainable organic traffic, our website design and development company can help. From Figma to WordPress theme to complete website redesign, we have 15+ years of experience in building successful web solutions.

Schedule your free website UX audit today.

Create a Bakery Website: A Step-by-Step Guide for Bakers

Create a bakery website or risk being invisible in today’s hyper-connected retail market. With 76% of mobile users searching online before visiting a store, local bakeries can struggle to survive without a professional website.  

Whether starting small or looking to scale your bakery business, our expert React.JS developers can help build a high-performing, dynamic website.

So, how to go about it? Scroll down and read the blog to uncover 8 actionable steps to create a bakery website, plus expert tips to amplify your online presence.

Let’s dive in. 

How to Create a Bakery Website in 8 Steps?

Just like baking a cake, creating a bakery website involves a series of steps in the right sequence. So, while you have a lot to bake, our website development company can help you build a professional website to serve your local and growing market.

Here’re the main steps leading to a good bakery website.

8 Steps to Create a Bakery Website

Step 1: Choose a Domain Name

As a bakery owner, you want an ideal location for your shop, right? That’s what a domain name is to your bakery when it goes online. It’s the digital address of your bakery. 

Key Tips for Domain Name:

  • Keep it Short, Simple Yet Memorable: A name like CustomCakeCreations.com is relatable and easy to remember. 
  • Reflect Your Brand: Include your bakery’s name or any USP. E.g., TheVeganBakery.com.
  • Use Relevant Keywords: Terms like “bakery” or “cakes” can drive user experience and SEO value.
  • Select the Right Extension: Use the industry-trusted extensions such as .com or .net. But options like. shop or. bakery can make your domain unique.
  • Check Availability: Use tools like GoDaddy to determine its availability. If unclaimed, secure it immediately. 

Step 2: Define Your Bakery Business Goals 

The foundation of a great bakery website begins with setting your business goals. Be clear about your expectations from the bakery website.

Key Questions to Ask:  

  • What’s Your Purpose? Decide if your website aims to expand market reach, showcase your bakery products, or generate custom orders.  
  • Who’s Your Audience? Determine your target market — local customers, event planners, or big corporates.
  • Do you have any Specialty? Highlight your bakery’s unique offerings such as custom cakes, butter cookies, or artisanal bread.
  • What are your future plans? What do you intend to do after creating a bakery website? Building a bakery web app/mobile app or joining marketplaces like Uber Eats. 

Step 3: Choose the Right Bakery Website Builder

Finding the perfect bakery website builder is essential to build your online presence. 

Popular Options: 

  • DIY Platforms: Use bakery website builders like Wix for quick and affordable website creation. 
  • eCommerce Platforms: Streamline online orders and inventory management with Shopify, Magento, or other CMSs.
  • Custom Bakery Website Builders: WordPress with WooCommerce supports customizations like cake builders or API integrations.  Consider fully custom-built solutions for unique project needs. 
  • Scalable Solutions: Choose a bakery website builder that supports your future plans such as running mobile apps, loyalty programs, or subscription services. 

Step 4: Add Food Menu & Gallery

Everything centers around your bakery’s menu and gallery. A survey claims up to 90% of online buyers consider photo quality critical to purchase. 

How to Design a Compelling Food Menu:

  • Visually Appealing Layout: Use professional and Instagrammable photos to make them irresistible.
  • Descriptive Names: Use descriptive, appealing names for goods (e.g., “Double Chocolate Lava Cake”).
  • Include Details: Mention important details like sizes, flavors, and customization options. Include key ingredients, especially for items like gluten-free or vegan products.
  • Organize by Categories: Organize the main menu into clear sections like “Cakes,” “Pastries,” “Breads,” and “Beverages”. 
  • Transparent Pricing: Showcase clear pricing to build an honest and transparent connection.
  • Special Offers: Add seasonal promotions or bundle deals to drive more sales. 

Step 5:  Add Cake Personalization Tools

Nearly 90% of consumers are likely to shop from brands offering personalized shopping experiences. Enable cake design app and make your bakery site stand out in the market.

Essential Features: 

  • Custom Cake Builder: Let users choose cake flavors, sizes, toppings, and decorations.
  • Photo Upload Feature: Enable customers to upload personal images for cakes with photo printing.
  • Real-Time Pricing Updates: Display the real-time cost during cake customization.  
  • Order Preview: A visual summary of the custom cake orders before checkout.
  • Special Requests Section: Include a text box for customers to add unique requests or preferences.

Step 6: Set Up eCommerce Tools

Transform your bakery website into a revenue-generating platform with the right eCommerce integrations such as 3rd party apps and tools.

Key eCommerce Features:

  • Online Ordering System for Bakery: Implement order delivery or pickup through your website.
  • Payment Gateway: Add secure payment methods like credit cards, digital wallets, or “Pay Later” options.
  • Flexible Shipping Options: Include local delivery, in-store pickup, or national shipping.
  • Subscription Services: Generate recurring orders with weekly, monthly, or annual subscriptions. 
  • Inventory Management: Use tools like QuickBooks for real-time stock updates. 

Step 7: Optimize for Mobile and SEO

Responsive bakery website design is non-negotiable. Non-mobile friendly sites can hurt your business growth with over 50% less likely to engage with such business. 

Best Practices: 

  • Mobile Responsiveness: Ensure your site functions consistently across all devices. 
  • Local SEO: Optimize your site for local searches with Google My Business.
  • Speed Optimization: Reduce page load times to under 3 seconds and keep users engaged.  
  • Clear Navigation: Make menus, categories, and buttons intuitive for mobile users.
  • SEO Optimization: Use metadata, alt tags, and internal links to improve SEO value. 

Step 8: Test & Launch Your Bakery Website

Test your bakery website before it goes live.

The To-Do List Includes

  • User Testing: Test the site’s usability by navigating as a customer, from casual browsing to cart checkout.  
  • Functional Testing: Verify that all features, like forms, payment gateways, and customization tools, work. 
  • Cross-Browser Testing: Ensure compatibility with browsers like Chrome, Safari, and Firefox.
  • Promote the Launch: Announce your website through email campaigns and social media ads.

Let’s build a website that’s as delectable as your bakery treats.

How Much Does It Cost to Create a Bakery Website? 

The cost of bakery website development depends on its complexity, features, and custom requirements. Here’s what you can expect:  

Basic Bakery WebsiteFeature-Rich Bakery WebsiteCustom Bakery Website
FeaturesStandard Pages (Home, Menu, About, Contact Us)
Online Ordering Form 
Static Gallery
Advanced eCommerce Functionalities (Payment Gateways, Order Tracking, etc.)
SEO Optimization 
Mobile-Responsive Design
Custom Cake Design Builders 
Loyalty Programs 
3rd Party API Integrations 
Scalable Interface
Estimated CostStarting from $3,000$6,000–$8,000$10,000+

Additional Costs: 

  • Domain and Hosting: $10–$50/month.
  • Maintenance and Updates: $500–$2,000/year.
  • Marketing & SEO: $1,000–$5,000/month, depending on your strategy.

Request a custom quote

Beginner-Friendly Marketing Tips for Bakery Websites

Created a bakery website? Great. Next, leverage the power of social media platforms to market your bakery website in the local market.

Actionable Tips to Drive Social Media Leads: 

  • Set Up Social Media Stores: Create an Instagram Shop and Facebook Store linked to your bakery website. 
  • Post Scroll-Stopping Visual Content: Share high-quality photos, BTS clips, baking tutorials, video testimonials, and more. 
  • Use Paid Ads: Run targeted Facebook and Instagram ads campaigns to connect with local customers. 
  • Engage Regularly: Run online polls/contests, respond to comments/DMs, and announce giveaways. 
  • Influencer Marketing: Collaborate with food bloggers or local influencers to expand your reach.

What to Do After You Create a Bakery Website?

Bakery website development is the 1st step to build your digital presence. We have curated three more solutions to help your bakery grow and succeed. Let’s find out more.

Build Bakery Web App to Boost Local Sales

Build a Bakery Web App.

A bakery web app adds to your business’s online success. It enables shoppers to order cakes, pastries, and other bakery goods, anytime, anywhere.

Actionable Steps:

  • Use your Website Framework: Reuse your bakery website design and backend logic.
  • Focus on Essential Features: Start with core features like online ordering, secure payments, and branch selection. 
  • Choose Scalable Technologies: Use frameworks like React.js for a dynamic front-end and Laravel for a robust back end.
  • Responsive Design: Ensure your bakery app works seamlessly across devices with responsive design.
  • Integrate with Backend Systems: Sync with your CRM and inventory to streamline operations.

Let’s build a custom bakery web app for your business!

Build Mobile App for Your Bakery’s Wider Reach

Mobile app development for bakery

Running a mobile app for bakery is no longer an option. It’s essential to expand your market reach and provide convenient shopping experience. Here’s how you can seamlessly transition from a bakery website to a mobile app:

Actionable Steps:

  1. Use Your Website Framework: Leverage your existing bakery website design and backend logic.
  2. Focus on Core Functionalities: Include must-haves like ordering, payments, and notifications, then expand with loyalty programs or subscription services.
  3. Choose the Right Development Approach: Cross-platform frameworks such as React Native help build apps for Android and iOS devices. 
  4. Integrate with Your Website: Sync with your backend for consistent inventory, orders, and payments.

Let’s build your bakery’s mobile app!

Automate Backend Operations with Bakery Management Software

Automate bakery's backend operation after creating bakery website

As per McKinsey study, automation can reduce operational costs by up to 30%. Streamline your bakery operations with automation tools that save your time and boost business efficiency.

Actionable Steps:

  • Manage Store Inventory: Track inventory in real-time to avoid shortages or wastage.
  • Simplify Order Processing: Use bakery order management software or tools to manage incoming orders. 
  • Enhance Customer Engagement: Send automatic notifications to customers about new deals, seasonal specials, or restocked items. 
  • Integrate POS: Integrate in-store POS with your website and app for consistent data across all platforms.

Let’s automate your bakery operations and save time and money! 

Frequently Asked Questions

1. What pages should be included while creating a bakery website?

Essential web pages for your bakery website include

1. Home
2. About
3. Menu
4. Contact Us
5. Gallery
6. Online Ordering
7. Recipe blogs

You can continue adding additional pages as and when required.

2. How much does it cost to create a bakery website?

Our bakery website development (menu, contact form, and static pages) starting from $3,000. However, a feature-rich eCommerce website can cost up to $8,000 or more.  Custom features like cake personalization tools or delivery tracking can further increase the budget.
Contact us and get a custom quote.

3. How much time does it take to create a bakery website?

A basic website takes anywhere between 4-6 weeks. However, a feature-rich website with advanced functionalities can take upto 2-3 months. The timeline depends on various factors, including the project scope, complexity, and custom requirements. 
Contact us and request a project timeline.

4. What if my budget is limited for bakery website development?

We recommend starting small and scaling your website as your business grows.
1. Consider MVP development with essential features like a menu, contact form, and online ordering.
2. Use WordPress with WooCommerce or Wix for basic functionality.
3. Add custom features like payment gateways in phases as your budget allows.
We can also build a bakery website in your budget. Contact us and get started.

Ready to Create a Bakery Website?

Creating a bakery website can be your ticket to growth. From showcasing bakery products to accepting custom cake orders, there are many growth possibilities. However, it doesn’t end here. It is just the beginning as you can explore bakery web and mobile app solutions to expand.   

Whether you’re a home baker, running a small bakery, or own a large chain. Our WordPress developers can help you build a bakery website, web & mobile app, and other software solutions.  

Ready to take the first step? Schedule a call and start your journey to create a bakery website and other solutions. 

The 7 Best WordPress Crowdfunding Plugins in 2025

Crowdfunding has reshaped how businesses, creators, and nonprofits secure funding. With the right WordPress plugin, you can launch a campaign in minutes. In 2025, the demand for flexible, feature-rich crowdfunding solutions continues to grow, with the market projected to reach USD 5.53 billion by 2030. Whether it’s a charity fundraiser, product launch, or community-driven initiative, WordPress plugins simplify Crowdfunding and pledge collection. But how do you find the plugins that are right for you?

At TBI, Hire WordPress developers who will not only help you choose the best WordPress crowdfunding plugin but also customize it to fit your exact requirements, ensuring a seamless user experience. 

In this blog, we’ll explore the 7 best WordPress crowdfunding plugins in 2025, their features, and how they can help you achieve your fundraising goals.

How Do You Find the Best WordPress Crowdfunding Plugin?

The WordPress crowdfunding plugin you choose will directly influence your campaign’s success. To make the best choice, consider these factors.

Key factors to choose WordPress Crowdfunding Plugins
  • Ease of use: Look for a crowdfunding plugin that’s easy to use, has a simple editor, includes the key features to share your story, offers straightforward payment options, and helps you connect with your donors.
  • Crowdfunding Features: Ensure your plugin supports key crowdfunding features like recurring donations, automated receipts, and reward systems to enhance donor engagement.
  • Payment Methods and Integrations: Choose a plugin that supports widely used payment options like Stripe, PayPal, Google Pay, and Apple Pay and easily connects with your existing CRM and email marketing tools.
  • User Reviews: Gain valuable insights into the plugin’s real-world effectiveness by examining user reviews on the WordPress plugin directory and official websites.
  • Pricing: Evaluate pricing models and choose a plugin that delivers value within your budget, with the option of a free version or adaptable pricing plans.

Choosing the Right WordPress Crowdfunding Plugin: A Quick Overview

Need a quick breakdown? Here’s a concise overview of the best WordPress crowdfunding plugins:

Crowdfunding PluginBest ForPrice
CharitableFundraising campaigns that require donor management.Free version available; premium plans start at $99/year.
WP CrowdfundingEntrepreneurs/startups who need Native Wallet System.Free version available; premium plans start at $149/year.
GiveWPNonprofits/charities who need Real-Time Fundraising ReportFree version available; premium plans start at $149/year.
FundEngineNonprofits/charities seeking an all-in-one solution with frontend campaign submission.Premium version starts at $49. No free version available.
IgnitionDeckEntrepreneurs/startups aiming to create a self-hosted, customizable platformCore version starts at $349/year.
Crowdfunding for WooCommerceBusinesses aiming to integrate crowdfunding into WooCommerce-powered online storesAvailable for free
WhyDonateNonprofits/charities who need peer-to-peer fundraising.Available for free

Best Donation Plugins for WordPress: In-Depth Guide

Discover the top WordPress crowdfunding plugins to effortlessly launch and manage successful fundraising campaigns.

At The Brihaspati Infotech, we specialize in crafting tailored plugin solutions to meet your unique requirements. While existing plugins may offer limited customization, we can build a fully custom plugin designed precisely to meet your requirements.

1. Charitable

This comprehensive WordPress WordPress fundraising plugin offers a robust suite of features designed specifically for nonprofits, making it easier than ever to raise funds, manage donations, and engage with your supporters.

Charitable WordPress Plugin

Top Features:

  • Recurring Donations: This encourages consistent support by setting up automated donations, ensuring a stable income for the organization.
  • Donor Management: It tracks donor information, donation history, and engagement levels, providing valuable insights for effective fundraising.
  • Customized Donation Forms: It offers a user-friendly interface with fully customizable fields and flexible donation amounts.
  • Multiple Payment Gateways: It not only supports major online payment methods like PayPal, Stripe, and Authorize.net but also accepts offline donations through cash, check, and wire transfer.
  • Automated Receipts and Thank You Messages: It helps you build stronger relationships with donors through automated tax receipt generation and personalized thank-you messages.

2. WP CrowdFunding

A powerful WordPress crowdfunding plugin that lets entrepreneurs, startups, and non-profits easily launch and manage crowdfunding campaigns from their website.

WP CrowdFunding Plugin for WordPress

Top Features:

  • Flexible Campaign Creation: This allows you to create diverse campaign types, including fixed funding, flexible funding, and time-sensitive projects.
  • Native Wallet System: Built-in wallet feature to track and disburse funds to campaign creators.
  • Front-End Submission and Management: Allows users to create and manage campaigns from the front end.
  • Reward System & Tiered Pledges: Incentivize supporters with tiered rewards by offering exclusive perks based on their contribution levels, fostering a strong sense of community.
  • Detailed Reporting & Analytics: Track funding progress, donor demographics, and engagement metrics to gain actionable insights

3. GiveWP

GiveWP is a user-friendly WordPress crowdfunding plugin known for its flexibility, ease of use, and extensive customization options.

GiveWP Plugin for WordPress

Top Features:

  • Customizable Donation Forms: Create branded, effective donation forms with a drag-and-drop builder to customize fields, amounts, and visuals with ease.
  • Donor DataBase: View detailed donor profiles, donation history, and engagement for better relationship building.
  • Real-Time Fundraising Reports: Track and analyze your fundraising performance with detailed donation reports, highlighting top forms, donors, and overall impact.
  • Visibility & Publishing Options: Easily control which campaigns are live, archived, or in draft mode, along with their donation forms.
  • Campaign Creation: Launch multiple campaigns, each featuring distinct donation goals, tailored messaging, and specific target audiences.

4. FundEngine

FundEngine Plugin lets anyone create a crowdfunding or donation site on WordPress, supporting both one-time donations and full-fledged fundraising campaigns.

FundEngine WordPress Plugin

Top Features:

  • Multiple Campaign Styles: Launch campaigns that fit your goals with personalized descriptions and visuals.
  • Multiple Payment Gateways: Supports PayPal, Stripe, and other major payment methods for secure donations.
  • Front-End Campaign Management: Users can manage their campaigns directly from the front end of their WordPress site, simplifying the process of creating, editing, and updating campaigns. 
  • Reward System and Perk Management: FundEngine allows campaign creators to offer rewards and perks to supporters based on their contribution levels. 
  • Reporting and Analytics: Displays live campaign status with funding progress bars and supporter count.

5. IgnitionDeck

IgnitionDeck WordPress Plugin offers a powerful all-in-one platform for launching and managing crowdfunding campaigns directly from the website.

IgnitionDeck WordPress Plugin

Top Features:

  • Front-end Project Creation: Allows campaign creators to launch and manage fundraising campaigns directly from the website frontend, eliminating the need for backend access.
  • Flexible Funding & Fee Options: You can choose when to capture payments, split fees, allow supporters to cover charges, and add donation options at checkout.
  • Customize Transactional Emails & Receipts: You can fully personalize donation confirmation emails and receipts to match your brand and communication style.
  • Built-in CRM: Track and manage donor information, transactions, and contact details without relying on third-party tools.
  • Advanced Reporting and Analytics: This offers detailed reporting and analytics, allowing users to track campaign performance, monitor donations, and analyze supporter demographics.

6.  CrowdFunding for Woocommerce

This plugin allows you to leverage the WooCommerce interface to create and manage crowdfunding campaigns, offering a unique blend of e-commerce and fundraising. 

CrowdFunding for Woocommerce Plugin

Top Features:

  • Native WooCommerce Integration: Fully integrates with WooCommerce, allowing you to use existing products as crowdfunding campaigns.
  • Flexible Campaign Options: Set funding goals, start/end dates, and durations to control how each campaign runs.
  • Campaign Progress Tracking:  Displays clear and visually appealing progress bars and funding goals, keeping supporters informed about the campaign’s status.
  • Multiple Reward Levels: Offer various pledge levels with different perks and incentives to attract more supporters.
  • Customizable Campaign Pages: Tailor campaign pages using WooCommerce templates and your favorite page builder for full control over design and layout.

7.  WhyDonate

WhyDonate Plugin simplifies crowdfunding on WordPress by helping individuals and organizations create impactful donation campaigns, manage donors, and connect with supporters through a user-friendly interface.

WhyDonate WordPress Crowdfunding  Plugin

Top Features:

  • Easy Campaign Creation: With its straightforward interface, the plugin allows you to create visually appealing donation campaigns by easily adding images, videos, and compelling descriptions to attract donors.
  • Recurring Donations: Support both single and recurring (monthly/yearly) donations, offering flexibility for donors.
  • Peer-to-Peer Fundraising: Add multiple personalized fundraisers on your site, each with unique donation buttons and styles.
  • Customizable Design: Fully customize the donation form, buttons, and placement to match your site’s branding; responsive across all devices.
  • Multiple Payment Options: Accept donations via a wide range of payment methods, including PayPal, Apple Pay, Google Pay, Credit Card, Klarna, and more.

Frequently Asked Questions

1. Can I customize the plugin to match my website’s branding and functionality?

Ans: Yes! Plugins like GiveWP and WhyDonate offer extensive customization options for form fields, colors, donation buttons, and layouts, allowing you to match your branding. However, these plugins may have limitations when it comes to specific customization.
Want a donation plugin tailored to your specific goals? Connect with our experts today. Hire WordPress developers who can create a plugin designed to meet your exact requirements.
Talk to us today!

2. Why choose WordPress crowdfunding plugins over third-party platforms?

Ans: A WordPress plugin lets you build an independent crowdfunding platform, granting you full ownership of your data, branding, and donor interactions, avoiding the financial burden of third-party platform service charges.

3. Can I use these plugins for projects other than crowdfunding, like pre-selling products or funding ongoing projects with recurring payments?

Ans: Yes, these plugins can be used for pre-selling products or supporting ongoing projects with recurring payments. Explore the right plugin today or talk to our experts to build a solution tailored to your goals!

4. How much does it cost to customize a WordPress crowdfunding plugin?

Ans: The cost depends on the complexity and scope of customization. 
Schedule a consultation & get a custom quote for your project!

Conclusion

The right plugin lays the foundation for a successful fundraising campaign. While powerful tools like GiveWP, FundEngine, and WhyDonate offer excellent built-in features, a custom solution can take your campaign to the next level. 

At The Brihaspati Infotech,  we build solutions that exceed the limitations of generic plugins, delivering custom-made results that match your goals and audience perfectly.

Want to launch a custom crowdfunding platform? Get in touch with our experts today!